
Welcome to the ultimate ‘How To’ Cooking Guide!
We believe that cooking brings people together. Hosting family dinners or friend potlucks is a reason to celebrate, eat good food, and enjoy the loving company.
Cooking is a hobby for some and a livelihood for others. It can also be a challenge or a skill others don’t really care to learn. However, I think everyone can agree that mastering recipes, in general, can be quite difficult. Recipes typically require a lot of mistakes to take place before the perfect mix of ingredients is finally found.
 We won’t be diving into any recipes today, but instead, answering the most commonly asked questions by food lovers. We’ll be covering various ‘how to’ questions about popular food items, whether it’s how to cook them or how to tell when they’re done so you can dig in and enjoy!
How Long To Cook Hot Pocket
Ok, let’s settle this once and for all. Hot pockets are a quick and easy bite for someone on the go. You have the opportunity to choose from many different flavors, and once you have one picked out, it’s super easy to cook.
Cook time is dependent on a few factors. First, you need to decide if you’re cooking one hot pocket or multiple hot pockets at once. Second, you’ll need to make a decision on how you want to cook your hot pocket/hot pockets. Are you looking to pop it in the microwave or put it in a pan in the oven? Lastly, cook time can vary slightly from flavor to flavor. Just so there’s no confusion, we’ll walk you through each hot pocket option and how long to cook them. Toaster ovens are also an easy way to get these cooked, and we have the perfect toaster oven suggestions here for you.
Before ever placing a hot pocket in a microwave, be sure to unwrap the plastic covering. Place your hot pocket into its crisping sleeve and on a microwave-friendly plate.
Flavor One: Pepperoni Pizza – Crispy Crust

If you opt in to use a microwave, check the wattage. For an 1100-watt microwave oven, cook one hot pocket for two minutes. Two hot pockets in the microwave at once will take a bit longer, so leave those in for about three minutes and 45 seconds.
In a lower wattage/compact oven, cook a single hot pocket for three minutes. The Hot Pocket brand recommends cooking one hot pocket at a time in this kind of microwave. Don’t forget to let your hot pocket sit for at least two minutes before digging in! Otherwise, you’ll be stuck with a burnt tongue and nobody likes that.
If you’re using a conventional oven, you’ll need to take your hot pocket out of its sleeve, place it on a baking sheet, preheat the oven to 350 degrees, and cook it for 28 minutes. This method of cooking your hot pocket is clearly more time-consuming, so it may not be the best way to cook it if you’re trying to get out the door.
Keep in mind that everyone has different kitchen appliances, so be sure to figure out if you have a lower vs higher wattage microwave oven before use.
Flavor 2: Pepperoni Pizza – Garlic Buttery Crust
This pepperoni pizza hot pocket cook time is very similar to the crispy crust pizza above. In an 1100-watt microwave oven, cook one hot pocket for two minutes and two hot pockets for three minutes and 30 seconds. If you’re using a lower wattage/compact oven, cook a single hot pocket for three minutes and 10 seconds.
As mentioned above, Hot Pocket recommends only cooking one hot pocket at a time in lower wattage/compact microwaves to get the best results!
If you’re making this hot pocket in a conventional oven, remove the hot pocket sleeve, place the hot pocket on a baking sheet, preheat the oven to 350 degrees, and bake for 28 minutes. An oven’s cooking time can vary, so just be sure to keep an eye on it and take it out when needed.
Flavor 3: Pepperoni and Sausage Pizza – Garlic Buttery Crust
Cook one hot pocket in an 1100-watt microwave oven for two minutes and two hot pockets for three minutes and 30 seconds. For lower wattage/compact microwaves, you’ll need to cook a single hot pocket for three minutes. Remember, throwing more than one in at once does not give you the best results!
If you’d rather take a slow cook approach, use a conventional oven to bake your hot pocket. Take off the hot pocket sleeve, place the hot pocket on a baking sheet, preheat the oven to 350 degrees, and bake for 28 minutes.
Flavor 4: Meatballs and Mozzarella – Garlic Buttery Crust
If you’re using an 1100-watt microwave oven, cook a single hot pocket for two minutes. Two hot pockets in the microwave oven at once should be left in for three minutes and 30 seconds.
In a lower wattage/compact microwave, one hot pocket will take about three minutes and 10 seconds. Be sure to let your hot pocket sit for at least two minutes afterward.
When cooking your hot pocket in a conventional oven, remove your hot pocket sleeve, place it on a baking sheet, preheat your oven to 350 degrees and bake for approximately 28 minutes. Some ovens are stronger than others, so keep an eye on your hot pocket and take it out when it looks golden brown.
Flavor 5: Philly Steak and Cheese – Seasoned Crust
For this flavored hot pocket, cook a single sandwich in an 1100-watt microwave oven for two minutes and ten seconds. Two sandwiches take about three minutes and thirty seconds. In a lower wattage/compact microwave, one hot pocket takes about three minutes and 15 seconds. Remember to let them sit for about two minutes to let them cool.
If you prefer to use your conventional oven, preheat it to 350 degrees. Be sure to remove the hot pocket’s sleeve, place it on a baking sheet, and bake for 28 minutes or until golden brown.
Flavor 6: Philly Steak and Cheese – Croissant Crust
This Philly steak and cheese has a croissant crust as opposed to the seasoned crust, so the cooking time slightly differs. Cook one hot pocket in an 1100-watt microwave oven for two minutes and two hot pockets for three minutes and 50 seconds. Lower wattage/compact microwaves take a little longer for one hot pocket, so leave it in for three minutes and then let sit for two to cool down.

If you’re opting into using a conventional oven, preheat it to 350 degrees, remove the hot pocket sleeve, place it on a baking sheet, and cook for about 28 minutes.
Flavor 7: Ham and Cheddar – Crispy Buttery Crust
This hot pocket is a classic. For this ham and cheddar flavor, place one hot pocket in an 1100-watt microwave oven for two minutes and 10 seconds. If you’re cooking two hot pockets at once, place them in the microwave oven for three minutes and 30 seconds.
If you have a lower wattage/compact microwave, one hot pocket will take three minutes and 15 seconds to cook. Let sit for two minutes!
In a conventional oven, use the same steps as the rest of the hot pocket flavors. Preheat your oven to 350 degrees and cook for 28 minutes.
Flavor 8: Ham and Cheese – Croissant Crust
Unwrap your hot pocket and place it in an 1100-watt microwave oven for two minutes. Two hot pockets in the microwave at the same time will take a bit longer, so leave those in for three minutes and 30 seconds. Lower wattage/compact microwaves aren’t able to cook a single hot pocket as fast as a higher wattage microwave oven. Cook one hot pocket for three minutes in a lower wattage microwave and then let it sit for two minutes. Don’t forget that cooking more than one hot pocket in a lower wattage/compact microwave does not give you the best results! So, try to cook each one separately.
If you’re using a conventional oven, remove the hot pocket from its sleeve, place it on a baking sheet, and bake for 28 minutes in a 350 degree preheated oven.
Flavor 9: Italian Style Sub
For all of you Italian sub lovers out there, this hot pocket is for you! This flavor hot pocket requires two minutes and 15 seconds in an 1100-watt microwave oven. Two hot pockets take three minutes and 15 seconds.
If you’re using a lower wattage/compact microwave, leave your Italian-style sub hot pocket in for three minutes and 35 seconds for a perfectly melted masterpiece!
Conventional ovens take a while longer to cook a hot pocket. Preheat your oven to 350 degrees and bake for 28 minutes or until it is cooked to your liking.
Flavor 10: Four Cheese Pizza – Garlic Buttery Crust
The four cheese pizza hot pocket is hands down a fan favorite. Pop your single hot pocket in an 1100-watt microwave oven for two minutes. If you’re eating two and want to cook them together, leave them in the microwave for three minutes and 30 seconds. A lower wattage/compact microwave can cook your hot pocket in as little as three minutes and 10 seconds! Just be sure to let it sit for 2 minutes so it’s not too hot when you dig in.
If you choose to use a conventional oven, preheat it to 350 degrees. Remove the plastic wrap and crisping sleeve, place the hot pocket on a baking sheet, and bake for 28 minutes.
Flavor 11: Five Cheese Pizza – Crispy Crust
Here’s another hot pocket fan favorite. If you have an 1100-watt microwave oven, cook a single hot pocket for two minutes and two hot pockets for three minutes and 30 seconds.
In a lower wattage/compact oven, cook your hot pocket for three minutes. Try to avoid cooking more than one hot pocket at a time in this kind of microwave for the best results.
For conventional ovens, preheat to 350 degrees and cook for 28 minutes. Let cool and then enjoy!
Flavor 12: Chicken Pot Pie – Flaky Crust
This hot pocket is super quick and easy. Pop one into an 1100-watt microwave oven for two minutes. If you’re eating two, put them in the microwave for three minutes. For lower wattage/compact microwaves, place a single hot pocket in for three minutes and then let sit for two minutes.
Just like all of the other hot pocket flavors, conventional ovens need to be preheated to 350 degrees. Place in the oven for 28 minutes and wait for a ding!
Flavor 13: Steak Fajita – Crispy Buttery Crust
To cook a steak fajita hot pocket, place it in an 1100-watt microwave oven for two minutes and 15 seconds. Cooking two of these at once takes three minutes and 15 seconds. Be sure to let these sit for two minutes after microwaving so the hot pocket can finish cooking and cool down.
In a lower wattage/compact microwave, a steak fajita hot pocket takes three minutes and 35 seconds. Placing two in at once will not get you the best results, so we recommend that you cook your hot pockets separately in this kind of microwave.
Follow the same directions as above for conventional ovens. Preheat to 350 degrees and bake for 28 minutes.
Flavor 14: Steak, Egg, and Cheese
This flavored hot pocket is a great fast breakfast option. In an 1100-watt microwave oven, cook a single hot pocket for two minutes and cook two hot pockets for three minutes and 30 seconds. If you’re using a lower wattage/compact microwave, cook one hot pocket for two minutes and 45 seconds.
This one takes a little longer than other hot pocket flavors in a conventional oven. Unwrap the plastic wrap, remove the crisping sleeve, place it on a baking sheet, and cook for 30 minutes.
Flavor 15: Chorizo, Egg, and Cheese
This hot pocket flavor is another super quick breakfast option! Cook one hot pocket for two minutes and 10 seconds and two hot pockets for three minutes and 30 seconds in an 1100-watt microwave oven. In a lower wattage/compact microwave, it needs to be cooked for three minutes and 15 seconds.
This hot pocket flavor needs to be cooked in a conventional oven for a little longer than the rest. Still preheat your oven to 350 degrees and unwrap from its plastic covering. Bake for 30 minutes or until golden brown!
Flavor 16: Cheddar Cheeseburger – Crispy Butter Crust
If you’re in the mood for a cheddar cheeseburger hot pocket, then pop it in the microwave and get munchin’. When you’re using an 1100-watt microwave oven, one hot pocket will take two minutes and 10 seconds and two hot pockets will take three minutes and 30 seconds.
Lower wattage/compact microwaves will be able to cook your hot pocket in three minutes and 15 seconds. If you’re opting into using a conventional oven, then preheat it to 350 degrees and bake for 28 minutes.
Flavor 17: Chicken Broccoli and Cheddar – Crispy Butter Crust
The chicken broccoli and cheddar hot pocket follows the same exact cooking directions as the cheddar cheeseburger hot pocket above!
Flavor 18: Chicken Broccoli and Cheddar – Croissant Crust
This chicken broccoli and cheddar hot pocket with croissant crust cooks a bit different than the crispy butter crust. If you’re using an 1100-watt microwave oven, cook one hot pocket for two minutes and 10 seconds and cook two hot pockets for three minutes and 40 seconds. In a lower wattage/compact microwave, cook your hot pocket for three minutes.
By now, you know the drill with the conventional oven. Preheat to 350 degrees, cook for 28 minutes, and enjoy!
Flavor 19: BBQ Recipe Beef – Crispy Buttery Crust
This hot pocket is for all of you barbeque lovers out there! In an 1100-watt microwave oven, cook a single hot pocket for two minutes and two hot pockets for three minutes and 30 seconds. If you’re using a lower wattage/compact oven, set the timer for three minutes. Let your hot pocket/hot pockets sit for at least two minutes so it can finish cooking and start to cool.
This hot pocket doesn’t require as much time in a conventional oven like the rest of the hot pocket flavors. Still preheat your oven to 350 degrees, but only leave it in for 26 minutes.
Flavor 20: Beef Taco – Seasoned Crust
The beef taco hot pocket is the last flavor we’ll be covering today! Cook one hot pocket in an 1100-watt microwave oven for two minutes and 15 seconds. Two hot pockets take three minutes and 45 seconds. In a lower wattage/compact microwave, set the cooking timer to three minutes and 10 seconds.
If you’re choosing to use a conventional oven, preheat it to 350 degrees, unwrap the hot pocket from its plastic cover and crisping sleeve, place it on a baking sheet, and cook for 28 minutes.
And there you have it! Now you’re able to perfectly cook any hot pocket flavor in a microwave or oven.
How Long Can Cooked Chicken Sit Out
Leaving cooked chicken out instead of putting it back in the refrigerator can put it at risk of being unsafe to eat in as little as two hours.

It depends on the temperature of the room, but if it’s anywhere between 40 degrees and 140 degrees and your food is left out, your food can easily become dangerous to eat. Bacteria grow very fast in that kind of climate, so if you leave your chicken out for more than two hours, you should throw it away to avoid any sick stomachs or foodborne illness. If your chicken happens to be in a room that’s 90 degrees, then consider your chicken unsafe after just one hour. It’s best to refrigerate your cooked chicken as soon as possible to avoid any sort of sickness.
How To Tell If Salmon Is Cooked
When purchasing salmon, we always recommend going to the seafood counter at the grocery store to find the freshest filets. They’re typically wrapped in paper with a sticker that explains how to cook that kind of salmon. It’s very important to always follow those directions and cooking times.
If you’re unsure of whether your salmon is cooked all the way through or not, try lightly pressing down on the top of the salmon with a fork. When the salmon is done, it should flake apart. Look for the thin little white lines that run down the salmon. Those lines are small strips of fish fat. If your salmon flakes away from those lines easily, then your salmon is done cooking!
It’s best to check the thickest part of the salmon when you press it with your fork. The thinnest parts of the filet will cook the fastest, so you’ll want to be sure the thickest parts are cooked all the way through.

How To Cook Ramen In The Microwave
Cooking ramen in the microwave is super quick and easy! We have to admit that it’s one of our favorite guilty pleasures to snack on when we don’t feel like cooking a whole meal. Follow these short steps to get the perfectly cooked ramen bowl:
Step 1: Grab a microwave-friendly bowl of your choice.
Step 2: Pour two cups of water into your bowl.
Step 3: Microwave that bowl with the water in it for about three minutes, or until hot and steaming.
Step 4: Add the ramen noodles to your bowl. If you like them long, then don’t crush the square at all. However, if you like the shorter noodles, crush the square apart in the bag before pouring them into the bowl.
Step 5: Microwave the bowl for about three and a half, four minutes.
Step 6: Take the bowl out and stir your noodles so they’re all separated.
Step 7: Microwave again for another minute and a half to two minutes.
Step 8: Add the packet of flavoring and enjoy!
How To Cook Pizza Rolls In Air Fryer
Are you an air fryer fan? If so, you’ll love this recipe for air fryer pizza rolls! You can cook them right from frozen so there is no need to thaw first. Cooked in just minutes, frozen pizza rolls have never been easier! Everyone loves pizza rolls and whether you are watching the game at home or treating the class after school, this delicious recipe is sure to be a hit! They are great served with your favorite marinara sauce or served with a dip. However you serve your pizza rolls, they are guaranteed to please the entire family.

- Begin by placing your pizza rolls in your air fryer basket. Typically we like to make about 25 at a time.
- Set your air fryer to 380 degrees
- Cook them for about 6-8 minutes shaking halfway through
- Add your favorite dipping sauce and enjoy!
One thing to keep in mind is not all air fryers are alike. If your pizza rolls don’t have a golden crisp yet after the 6-8 minutes consider leaving them in for a few more minutes to ensure they are cooked all the way through. The best way we think to make pizza rolls is melting a little butter and adding garlic then shaking your pizza rolls in them for an amazing snack! No more wondering how long to cook pizza rolls in an air fryer! If you are looking for a more mild way to spice up your pizza rolls consider melting some extra cheese on top or adding melted mozzarella to your marinara for dipping. Check out some of our other great pizza recipes, here!
How Long Does A Rice Cooker Take
Rice pairs perfectly with pretty much anything which is why getting it cooked to perfection is so important. Rice cookers are such a seamless way to conveniently cook your rice. Depending on what kind of rice you are using (brown or white) can alter your cooking time. Not only can the type of rice alter your cooking time but the kind of rice cooker you are using as well.
When cooking white rice in a rice cooker one cup will cook in about 25 minutes. However, if you are making 3 cups it will take about 35 minutes to be fully cooked. On the other hand, one cup of brown rice takes around 1 hour and 3 cups will take about one hour and 15 minutes in your rice cooker. However, always read the directions on your rice cooker beforehand to ensure these times because some models may cook a little faster than others.
If you are still worried about how long your rice needs to be cooked for, don’t worry! Most rice cookers like this one from Aroma, have a sensor on them when all the water has been absorbed and will switch off. Some more expensive rice cookers will also have timers and buttons for the exact amount of rice portions.
How To Cook Beyond Burger
Beyond burgers is a great vegetarian alternative to meat. So while it may not be real meat you may be confused about how to cook it properly. We are going to outline a few of our favorite ways to cook your beyond burger to perfection. Grill or not we’ve got you covered!
Grill
- Start off by turning on your gas or charcoal grill and letting it preheat for a few minutes. Next throw on your beyond burgers letting them cook for 3 minutes on each side. Before taking them off the grill use a food thermometer to check the internal temperature which should be around 165 degrees Fahrenheit.
Pan
- Get a non-stick pan and heat it over medium-high heat to begin. Then lightly oil or butter your pan and put in your beyond burgers. You will want to cook them on each side for about 3 minutes. If you like your burgers cooked longer feel free to leave them longer but the texture of the burger may not come out as great. Again you always want to make sure the internal temperature is 165 degrees Fahrenheit.
These are just two of our favorite ways to cook beyond burgers but feel free to get creative with it! If you want to throw them in a casserole or omelet we still recommend using one of the above methods to brown them a little. If you are in a time crunch and aren’t able to thaw your patties before cooking these methods will still work! For frozen patties, you will want to cook them for about 6 minutes on each side, a total of 12 minutes from start to finish. Some people prefer the frozen method because it can result in a crispy edge on your beyond burger.

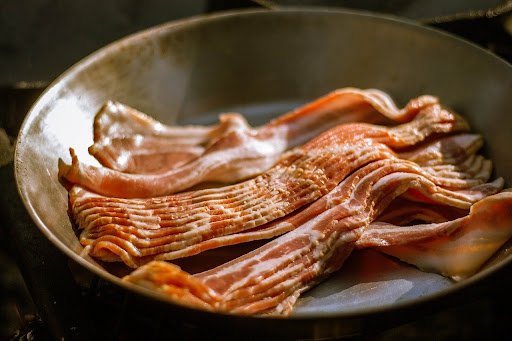
How To Cook Turkey Bacon
Turkey bacon is, health-wise, the polar opposite of pork bacon. Some might even say it’s downright lovable. Turkey bacon has fewer calories and a lower fat content than traditional bacon. This is great for family and friends who are heart and health-conscious or are simply watching their cholesterol. But! Just like pork bacon, turkey bacon is high in saturated fat and sodium, so enjoy in moderation like all special treats. That’s why we have given you 3 different ways to enjoy this savory treat no matter where you are.
In the oven
There is no frying required with this option and it only takes about 15 minutes to bake the bacon at 400 degrees on a sheet pan. Line your pan with foil for easy clean-up. You will want to flip your turkey bacon halfway through to ensure a crispy bite. Your kitchen will smell so good while it bakes, but be warned it will leave your kitchen smelling like bacon for the rest of the day.
Want extra flavor and spice to your turkey bacon? Try adding black pepper over the turkey strips before you bake them. But if you love the health benefits of turkey but don’t want to give up the classic curled edges that accompany regular bacon, just lay down a sheet of heavy-duty aluminum foil underneath your turkey bacon and pop it in the oven. The bacon will crisp up nice and crispy while holding its iconic shape as it cooks.
In the microwave
What if I told you that you could have crispy turkey bacon right out of the microwave? No preheating the oven, no messy spatters all over your range or oven. You just heat it up and enjoy! You might think I’m crazy but it can be done. How? Turkey bacon doesn’t require as much prep work as regular bacon. It can be microwaved without shrinkage or curling, and still has great texture and flavor.
The turkey bacon should be cooked for about 2 minutes because it’s undercooked otherwise. Try placing your stripes of turkey bacon between 2 paper towels to allow for easier cleanup. Before serving, make sure that the turkey bacon is fully cooked and not cold. For those of you who love your turkey bacon cooked crisp and crunchy, this method is not ideal.
In a Skillet
Typically you can cook turkey bacon in a pan or skillet the same as regular bacon. However, we recommend adding 2 tablespoons of oil to the pan before placing your stripes in. Once you place your turkey bacon in the skillet make sure to turn it in every 2-3 minutes to prevent burning. It should take about 8-10 minutes to fully cook your bacon and get the crispness you desire. After it’s finished cooking, place your cooked turkey bacon on a paper towel to remove any excess grease.
While turkey bacon does not look exactly like regular bacon these cooking methods are sure to satisfy your taste buds. Another alternative way to cook turkey bacon is in the air fryer at 400 degrees for about 5 minutes. This way is sure to get your turkey bacon crispy and full of flavor. Now that you know how to cook turkey bacon in the oven and in the microwave you have a great and healthy alternative for your family.
How To Cook Frozen Fries In Air Fryer
Everyone loves french fries, especially with a hot and creamy dipping sauce like fresh ranch dressing. This recipe for frozen french fries is certainly not one to be missed! Making this in the air fryer brings the best tasting result and is healthier than deep-frying. Air Fryers have become all the rage and there are plenty of great recipes out there. French fries are almost too good to be true, they’re that good! Everyone loves them and they make a perfect snack or side dish. Now with this easy recipe, you won’t love them any less, but you’ll love that you can eat more guilt-free for fewer calories and fat!

Regular or crinkle cut fries: Crinkle cut fries tend to take a little longer due to their thickness but don’t worry it’s still faster than cooking in your oven. Make sure to preheat your air fryer to 400 degrees before you start cooking. After your air fryer is preheated, throw in your regular or crinkle-cut fries for 12-14 minutes or until crispy.
Sweet potato fries: Preheat your air fryer to 400 degrees. Once preheated, toss in your sweet potato fries and cook for 13-15 minutes. Make sure you are shaking the fries halfway through to make sure each fry is getting crispy!
Waffle fries: Your frozen waffle fries will need to be cooked for about 10-12 minutes at 400 degrees Fahrenheit. Halfway through the cooking time, you will want to make sure you flip your waffle fries.
Shoestring fries: Shoestring fries are smaller in size and thickness which is a great option when you are looking for a quick meal. Pop in your frozen shoestring fries to your air fryer at 400 degrees for 7-9 minutes.
To really elevate your fries in the air fryer try tossing them with salt after they are finished cooking. If you are entertaining a big crowd when cooking these fries and need to cook in batches make sure to throw all the fries in after cooking for 1-2 minutes for a quick and easy reheat. Lastly, fries need a great dipping sauce to accompany them. Our favorite is a garlic aioli that only takes 5 minutes to make. All you need is mayonnaise, garlic, olive oil, lemon juice, salt, and pepper. It’s the perfect addition to any fry!
How To Cook Chicken Sausage
Chicken sausage is a versatile protein that’s always delicious when cooked. Whether you want to add it to pasta, pizza, or tacos, chicken sausage always shines. By using basic ingredients and just 20-minutes of cook time, this easy oven recipe takes simple sausages to the next level. You can never go wrong with baked chicken sausages. Oven stuffed, broiled, or pan-seared — there’re so many ways to use and cook tasty chicken sausages!
Oven
Preheat the oven to 375 degrees Fahrenheit and make sure the oven rack is in the center position. Spray a baking sheet with cooking spray or olive oil and place the chicken sausage on the tray, leaving space between each sausage. Bake the chicken sausage for 10 minutes on one side and then flip them over with tongs. Before eating your chicken sausage make sure the internal temperature is 165 degrees to ensure it is fully cooked.
Pan
Get a non-stick pan and heat it over medium to high heat. Use the fat from the chicken sausages that accumulates in the hot pan and cook for 15-20 minutes. Make sure to turn them over regularly so they get an even cook and don’t burn.
Boil
Boiling is one of the simplest ways of making sausages at home and will make sure the sausages are cooked properly. When boiling sausages, first take a large pot and fill it with water. Depending on how many sausages you wish to cook, use 1/2 to 3/4 or even more water in the pot. Once you have added water into the pot, place it on high heat and wait for the water to come to a rolling boil.t will take around 8 to 10 minutes for pre-cooked sausages to be ready, whereas it could take up to 20 minutes for raw ones to be ready for consumption.
Chicken sausages will give you the dose of protein that you need after your next workout. They are loaded with amino acids, vitamins, minerals, and dietary fiber to give your body an instant energy boost. Plus, they are easy to cook, affordable, and taste delicious in a wide range of recipes. Chicken sausages can be cooked in any way that you like — grilled, boiled, or pan-seared — they always turn out to be great!
How Long Does Cooked Shrimp Last In The Fridge
Cooked shrimp is highly perishable; if it is not cooled properly and stored at proper temperatures, cooked shrimp can cause foodborne illness in as little as two hours. The proper storage of cooked shrimp will depend upon how long the shrimp will be stored before being consumed.
When you are storing cooked shrimp in the fridge you should properly store it within 2 hours of cooking. After proper storage, it should be fine to eat within 3-4 days. However, you may notice some changes in texture, flavor, and color. Ultimately, cooked shrimp only lasts for about 3 hours at room temperature. For even lengthier shelf life, it can be stored in the fridge, where it will last for up to a week. Given that cooked shrimp often tastes best when served cold, this is the ideal scenario. In other words, if you’re having a cookout and need to store cooked shrimp over the course of many hours, be sure to transfer it to an airtight container and place it in the fridge right away.
So, hopefully, these answers have provided you with some clarification on how long cooked shrimp will last in the fridge. It’s not always easy to tell if cooked shrimp has gone bad since the smell of shrimp can change. The best way is to smell and look at the shrimp: signs of bad shrimp are a sour smell and a slimy texture; discard any shrimp with an off smell or appearance, do not taste it first.
How Long To Cook Pasta
The length of time and temperature at which you boil the pasta affects how it cooks. The longer pasta such as Penne, Campanelle, and Rigatoni are boiled the softer they may become. Thin pasta like Fettuccine, Angel hair, and Spaghetti are boiled for shorter periods of time. Fresh pasta cooks much more quickly than dried. If you decide to go the fresh pasta route and want to use a traditional sauce recipe, you’ll want to cook the noodles about half of the time designated on the box. And never rinse your pasta—it prevents it from absorbing vital starch that helps keep it al dente. Pasta cooks better when it’s dry.

The amount of time it takes to cook pasta varies quite a bit. It all comes down to the amount of liquid in the pot as well as how much of the pasta was initially submerged in that liquid. The best way to determine the time it will take for your pasta to cook is to first bring the water to a boil. The chart below is a rough guide to pasta amount conversions. It doesn’t matter what brand you use or the shape of the noodle.
| Type of Pasta | Cook Time |
| Pene, Elbow macaroni, Linguine | 9-13 minutes |
| Fettuccine, Shells, Rigatoni, Lasagna noodles | 12-15 minutes |
The best way to figure out how long you should cook your pasta is to go by the Italians’ rule of thumb for al dente pasta: take a piece of pasta from the pan, cut off a tiny piece, and chew it in your mouth. If it’s still a little crunchy, give it more time. The most important thing to remember about cooking pasta is that it has to be cooked “al dente,” which means it should be firm to the bite. Cooking time depends on the exact shape and thickness of the pasta, but usually, cook your pasta for 3 minutes less than the time listed on the box.
Sources:
https://restaurantstella.com/how-to-cook-frozen-beyond-burger/
https://thymeandjoy.com/air-fryer-turkey-bacon/
https://therecipecritic.com/air-fryer-frozen-french-fries/
https://www.spendwithpennies.com/aioli/
https://wholelottayum.com/chicken-sausage-in-oven/
https://theinfinitekitchen.com/advices/faq-how-to-cook-chicken-sausage-in-pan/
https://www.stilltasty.com/fooditems/index/18320
https://whatscookingamerica.net/pasta_rice_main/pasta.htm
https://thisvsthat.org/700-watt-vs-1100-watt-microwaves/
https://www.articleinsider.com/toaster-oven
https://www.articleinsider.com/how-to-toast-a-bagel-in-the-oven/
https://recipemarker.com/perfect-hot-pocket-cooking-times-in-a-microwave-and-oven/
https://www.southernliving.com/food/seafood/fish/salmon/how-to-tell-when-salmon-is-done